While building a successful online teaching business is a multi-step project, when you're new to work of teaching online, there are advantages to just GETTING STARTED TODAY.
Because what's the alternative?
Lists, thinking, planning, strategizing.
All good . . . but until you've tried out some of the work, until you've put pen to paper on specific tasks, a lot of that thinking is hypothetical.
While some of you will move quickly from plan to action, many others may find yourself delaying, waiting for the perfect time, waiting until you have the entire plan set.
There's a lot to be gained from taking steps forward, getting feedback, learning as you go. Maybe you know what you can do to start moving forward right now. If you do, then go for it. If not . . .
Here are 5 tasks to start working on right now that will move you forward in creating your own online course–and that will feed the planning and entry into the full-fledged system you will need to use for success.
1. Inventory your skills.
 The most successful online class will come out of your own areas of expertise: your talents, your special ways of doing things.
So lets take an inventory–but I don't just want you to list the things you think you know.
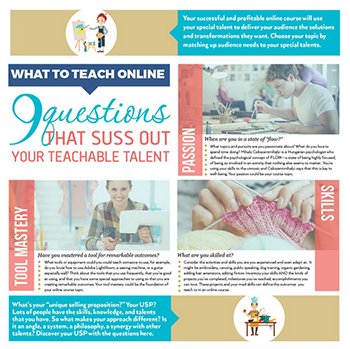
I want you to use my worksheet to look at your talents from a variety of angles. Maybe you've come by expertise through years of hard study OR maybe your talent is your ability to help someone change their practices OR maybe you've got expertise with a tool or a system.
Let's find out.
Click here to get Teachable Talents Worbook2. Listen and engage with your people.
Make a list right now of 3 communities where you can actively “listen” and engage with people you think might buy your course.
The goal is to understand how you can solve problems for these people or help them reach their most frequently voiced aspirations.
As you listen, keep track of the products, advisors, gurus, blog, magazines and resources this audience is referencing and praising.
As you engage, ADD VALUE: teach, share resources and tips of value.
CLICK HERE FOR A SPREADSHEET TO TRACK YOUR LISTENING.And here's a video lesson on this process.
3. Make a short “sliver” lesson.
The goal here is to get comfortable with creating online lessons AND to have something you can share for free (see #4 and #5 below). This should be a “sliver” of an actual lesson.
For example:
- If you're teaching people how to become a top ranker on SlideShare, the “sliver” lesson will be on how to make a great PowerPoint cover slide or on how to choose your colors and fonts for a PowerPoint slideshow.
- If you're teaching people how to homebrew beer, your “sliver” could be on the essential equipment or planning your brew day.
- If you're teaching people how to sew curtains, your “sliver” could be on choosing curtain fabric or on threading the sewing machine.
So you're choosing a small piece to teach, something that people need to know early on, and you're going to make a lesson. That lesson might be a video demo. It might be you talking to the camera. Maybe it's a screen-capture lesson or perhaps it's done in a live conferencing/webinar setting and recorded.
At the end of this you'll have worked with course creation tools and you'll have a “freebie” to share.
4. Set up your “sliver” lesson so that you can offer it in exchange for an email address
This is going to require doing a few pieces of work.
Just do it!
Don't overthink the email provider choice right now. The goal is to become familiar with the work of hosting your freebie and using email lists, tags, opt-in forms, and autoresponder sequences. You'll see that in this step I'm asking you to contract for document or video hosting and for email services.
If you're serious about teaching online, these are necessary, so let's dig in and figure it out now. Let's get you set up so that you can be offering freebies early on and full classes down the road.
a. Put your “sliver” online somewhere. If it's a pdf, use Amazon S3 to upload it–be sure to make it public–and get the URL. If it's a video, use Vimeo or Wistia to upload and host it. Set it to private so that only those who have the link can see it. Get the link.
b. You'll need an email service provider (like ActiveCampaign or ConvertKit or Mailchimp). While I think choosing the right email service is a crucial first step, I also know that, in the very beginning, it's easy to move to a different service. I also know that reading about how it works, talking about how it works doesn't give the clarity that using the email service will. My choice for you would be ActiveCampaign or ConvertKit–and I'll get into that in a future blog post. So sign up for one of them at the lowest rate.
Set up your list that captures firstname and email address. Set up a “tag” for this list that you'll add to anyone who asks for your “sliver” lesson. (Note, if you're using Mailchimp, you'll be setting up a new list for every freebie vs using tagging that I just described. )
c. Set up an “opt-in” form or landing page with your email service provider. Active Campaign calls them “subscription forms.” ConvertKit calls them “opt-in forms.” This is the way you can ask people for their name and email address and get that name and address onto your list.
d. With your email service provider, compose an email that says, “Hey, Here's your lesson” and include a link to the free lesson in the email. Set things up in your email service provider so that when someone gets added to your list/tag, that email is triggered. In ActiveCampaign, you'll do this with an “autoresponder campaign.” In ConvertKit, you'll do this with “sequences.”
5. Put the word out that you've got a free lesson
Now let's get you executing on promotion of a small free offering. Not only does this get you moving forward with mechanics, it enables you begin to gauge interest in your topic and you as a teacher.
You've set up the “opt-in” in the step above, either by creating a landing page upon which you offer your freebie and collect emails or by embedding that opt-in form on your website. You've got a web URL for that opt-in.
Make it public in any number of ways:
a. Present it embedded into a blog post OR provide a link to the landing page within the blog post
b. Share it in communities where the terms of use allow such sharing. You could always share the freebie without the opt-in (i.e., you won't be collecting email addresses). I do this with webinar replays that I know will be super helpful when a community doesn't allow gathering emails.
c. Run a Facebook Ad. The easiest foray into this would be to put the freebie in a blog post. Add a Facebook post about that blog post (you need a Facebook Page to do this) and then “boost” the Facebook post.
d. Ask your network to share your “sliver” lesson. That's right, message your friends, and ask them for help.
Are you ready?
Which one of these steps are you going to tackle first? I realize some of these require contracting for services and even buying tools. But if you're serious about teaching online you're going to need these and this is a great way to JUST GET STARTED!
