 To teach an online class you need a home base on the web. You don't have to have an elaborate website, but you need a place for providing these basic tasks:
1. Present your credentials
2. Attract and host traffic
3. Build your email list
4. Deliver your online class
A WordPress website is well-suited to this work. Read on to see why–and just how to get the work done.
Four Things Your Website Does for Your Business
1. Your website is a place to present your credentials
The first thing an online home does is provide a place to present your credentials. What do you do nowadays when you come across someone who tells you they've got a solution or service for you? I know what I do. I search for them online. Let's see, I think, just what do they have going on? There's nothing like finding that they have a nice-looking and up-to-date website to increase my confidence and interest in their offering.
Your credentials are revealed in multiple ways on your website. The first is through your about page. The about page is one of the most visited pages on most websites. The key thing to understand is that your about page is as much about your customers and how you can help them as it is about your vita.
Your credentials are also revealed through the accumulation of useful published content there. As you develop your web content, keep in mind it's more importance to be helpful and relevant than it is publish a great quantity. If a visitor is evaluating your credentials, the most positive thing for them will be to see that you're answering the questions they have and that you're evidencing experience and knowledge on the topic you teach.
Your credentials are also revealed through testimonials. This can take the form of social proof in which you show the number of shares of posts or likes of your website. You might use a widget in the sidebar to show community conversation or your posts may have enthusiastic comments on them. You could share “as seen on” logos and you might have straight-out enthusiastic testimonials. With a new business you won't have these right away. And that's ok. But I want you to understand that as time passes you will accumulate them and can present them on your site as a part of your credentials.
2. Your website attracts and hosts web traffic
A web home also helps you attract online traffic. Initially, you won’t see a lot of organic traffic but as the months roll by, if you're writing blog posts that provide useful solutions on the specific topics your audience is interested in, you will increase the likelihood of getting traffic to your site through online search.
First, web traffic comes through online, organic searches. As you steadily write blog posts, share them and ask others to do the same, the likelihood of your site being found in online searches will rise. Someone looking for specific info on how to design a logo or paddle a stand-up kayak or use a Photoshop technique can end up at your website.
Traffic will also come from links to your website. Those links might be in tweets or Facebook posts shared by you and others. If you got images in your posts that lend themselves to pinning, you’ll gain Pinterest links to your site. Conversation in online forums and Facebook groups in which your content is shared will link over to your website. Other bloggers who find your content and/or services valuable will link to your website.
Links to your website can also come through promoted social posts and paid ads. Even if you share lots of content on a social platform like Facebook, your end goal is to get people visiting your website, your home base.
Are you seeing how important it is to have an appealing and up-to-date web home for your business so that you can encourage traffic and then present a professional destination when that traffic arrives?
3. Your website is a tool for building your email list
Your web home is an essential tool for building your email list. It provides a place from which to serve up your opt ins–those forms that invite visitors to enter their email address in exchange for an appealing free lesson or video or worksheet or tool.
Your website enables you to build your email list when you offer great free content in exchange for an email address. An email list is ESSENTIAL to selling an online class, and building your list should be a constant activity.
Use your web home to build your list by making sure that visitors know you’ve got something for them and making it easy for them to trade their email for that something.
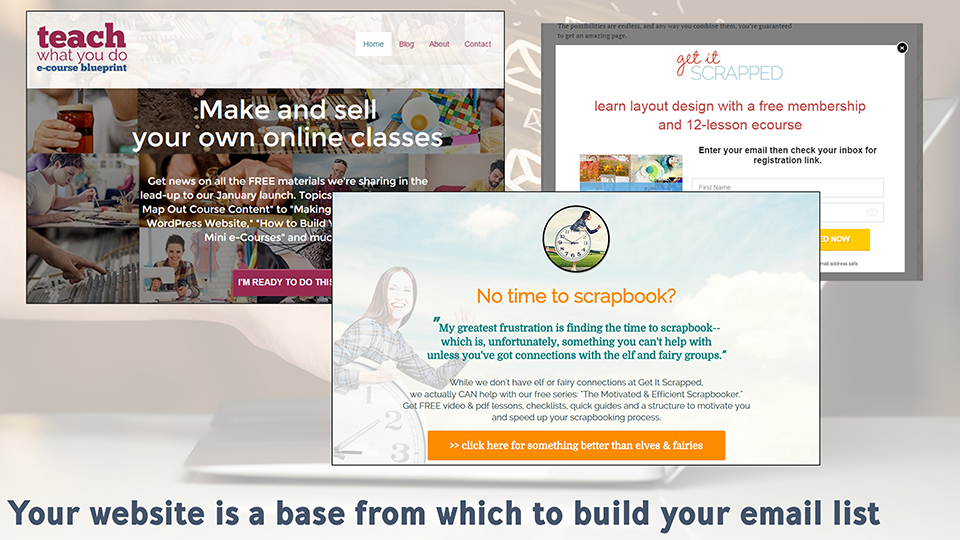
Make sure you’ve got an invite on your home page above the fold. Here, at Teach What You Do, I’ve got an invite to get news and free tools connected to a button above the fold.
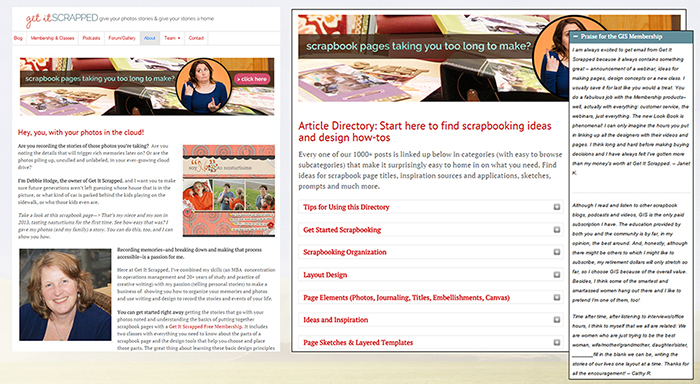
Add offers on your blog posts and in your sidebars. At my site GetItScrapped.com, I offer free items at the bottom of every blog post, in the sidebar an even in blog and forum headers. When someone clicks on any of those offers, a box pops up to collect their email.
You can also make pages on your site that are dedicated to a list-building offer. My paid Facebook ads go to these kinds of dedicated pages. While visitors won’t stumble across these pages, still they are placed on my website with my website's URL. This gives the landing page credibility and makes the visitor more comfortable with sharing their email address.
4. Your website enables you to deliver your online class
Finally, your web home can be the base from which you deliver your class materials and course experience.
Yes – you could go to a shared platform like Udemy or Craftsy but you’ll lose control and flexibility. Know, though, that your course will be presented alongside many others, and it will be a part of that site’s discount and payment terms. I’d rather see you build your own brand and platform.
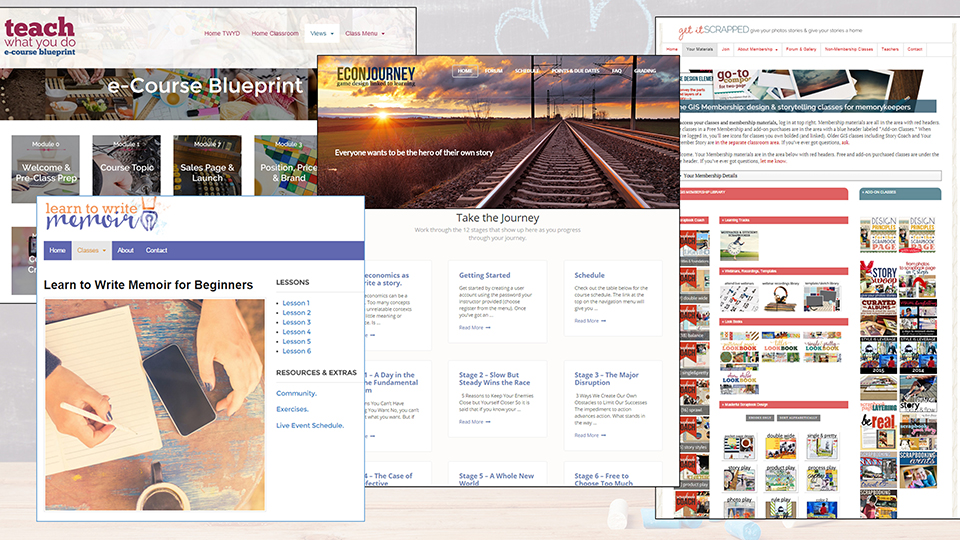
With your own website, you set up posts or pages that present class content—which could be videos or ebooks, worksheets, audios, and even live events. Use a membership plugin to protect class materials and to sell access to those protected areas. Click here for a free webinar replay that walks you through the details of using WordPress features to create an online classroom.
Why I recommend a WordPress website as a good choice for your online home and e-Course
1. WordPress is free to use and there are no “terms of use. You might pay for add-ons that affect look and extend functionality but the basic WordPress install is free, and you can do with it what you will. There is a steeper learning curve with WordPress than with a site builder like Squarespace or Wix. BUT there’s plenty of training out there and, if you’re in this class, you’re here to build a business. If you want to make a wedding site or a memorial site or a personal resume or story site, those others might be fine. But for a business, go with WordPress.
2. Wide acceptance of WordPress is driving innovation. Approximately 23% of all websites on the internet as of 2015 are WordPress websites.
This widespread adoption of WordPress has driven commercial interest, and with that competition and innovation. This has drawn companies to making extensions for WordPress, and the result is the ease with which you can extend its capabilities. You can present a portfolio, create a classroom or membership website, and even make a store with extensions called “plugins.”
3. For all its power, WordPress is relatively easy to use. Yes there is some start-up learning to do and you might have to hire help, but for what it does it is relatively easy to learn and use.
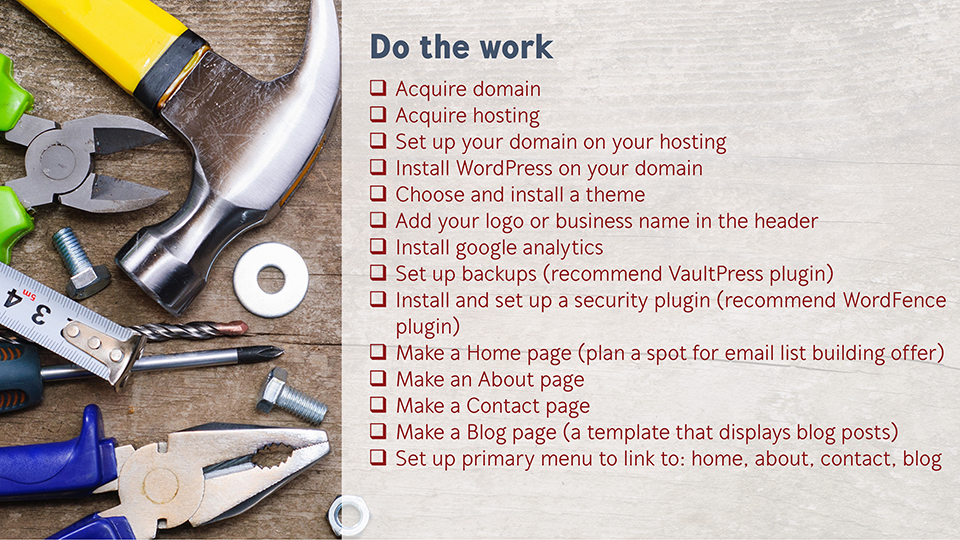
How to install a WordPress website
- The install begins with the purchase of a domain. My websites are on the domains teachwhatyoudo.com and getitscrapped.com. I purchased them from Go-Daddy.com.
- You also need to purchase hosting. You can start with a low-cost, shared hosting, and, as your business grows, if you need to move to dedicated hosting, do that later. The low-cost hosting will be under $10 per month. My current hosting for my businesses and my active membership site is $174.
- With your hosting and domain purchased, your hosting will give you nameservers. Set up your domain to point to these name servers.
- You will probably control your hosting through a tool called cPanel. Your host will give you cPanel login details after purchase. Within cPanel there should be the capability to install WordPress to your domain. Install WordPress.
- That WordPress site right now won't look all that great and the next step is to add a theme. The theme controls the look and layout of your site.

What if you haven't determined domain name or branding yet?
You might be in a “chicken-or-the-egg” situation at the moment. I'm both encouraging you to stop and listen before determining your class topic and telling you to get a web home established. There’s the question of whether you’ll establish a business that’s the umbrella for multiple e-courses or whether the e-course is the business.
So what to do? I recommend getting started with a web home on a domain even if that domain might change. You can move the site to a different domain later and getting started now gets you familiar with WordPress and working on key website pieces.
A year ago I purchased the domain “YourContentBoost.com” because I thought I wanted to offer content management services with several coaching classes on topics of traffic-building, e-course building, podcast-building and membership building a part of those offerings. A few months later I focused more and bought yourcreativecontentboost.com and moved the site to that domain and began developing the framework for the Teach What You Do e-Course Blueprint Class. This summer I decided to house the business at TeachWhatYouDo.com and so moved it yet again. It was not tough to move the site and each time I tweaked the logo, but stuck with original colors and fonts. I pointed both of those other domains to TeachWhatYouDo.com.
I'm currently setting up the Teach What You Do e-Course Blueprint class on a subdomain of TeachWhatYouDo and additional classes will also be installed on other subdomains. A subdomain adds a prefix to the domain but doesn’t have to be purchased new. For example my classroom at Get It Scrapped is at the subdomain of it: classroom.getitscrapped.com.
So get going. A domain should not cost more than $15 for the year and could even be as little as $2.99. Moving the WordPress install isn’t tough, and this way you get started.
Add a WordPress theme
I mentioned that you’ll need to add a “theme” to your WordPress install for defining the “look and feel“ of your site.
Selecting a theme can feel like a big and confusing step. I know. I've been there, spending hours and even days trying out themes and trying to decide which one to use. My best advice is to buy a theme from a company that's got a solid history, flexibility, and that offers strong support–especially a robust community of users. I use the Canvas theme from Woo Themes–it doesn't look all that exciting on their website, but because it is their cornerstone theme it's customizable. All of my websites are built with canvas and they all have different looks.
If I were to recommend a theme for any of you, I'd say buy a subscription to the entire Elegant Themes library and start with the Divi theme. Just get it up and live with it for a while. The price is reasonable. The company's reputation, support, and ongoing innovation is impressive. You'll also get extras like forms and pop-up plugins included with your purchase.
The thing about Divi is that it's got a modular page building capability right in it—and that means you can build great-looking showcase pages yourself.
Be sure to install these plugins for maintaining your WordPress website
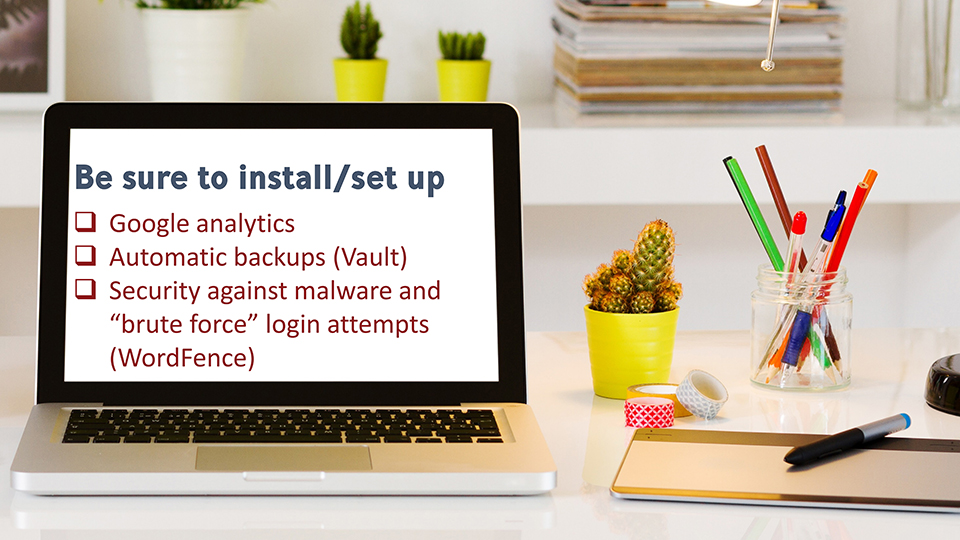
Install google analytics. Google analytics lets you see stats on how many people are visiting your website, where they’re coming from (for example did they find you via a search or were they referred via a link), and which pages on your site they are visiting. Installing Google analytics means getting an analytics account if you don't already have one. When you set up the analytics account you’ll get code to add to your website to do the tracking. Many themes have a spot for adding the code. If not, you can use a Google analytics plugin to insert the code.
Set up automatic backups. You can use a plugin to do this. I’d recommend the VaultPress plugin, and that will cost $9/month.
Figure out how to handle security. You need regular scans of your site for potential insertions of malware and you need a defense against “brute force” login attacks. Install the WordFence plugin, set it up and pay attention to any warning or messages it provides. Learn how to do this right now and make it a part of your site maintenance. To that end. Be sure you have a STRONG password. You will be the admin of your site and if a hacker breaks your password they will take down your site. Of course, you’ll be doing daily backups, so you can restore it if there’s a problem—but better to be safe from the start.
First site content to set up
One thing to understand is that in WordPress you can add POSTS and PAGES. What’s more POSTS can be organized in CATEGORIES. Use posts for blog content. Use pages for static information – like that on your about page or a static home page.
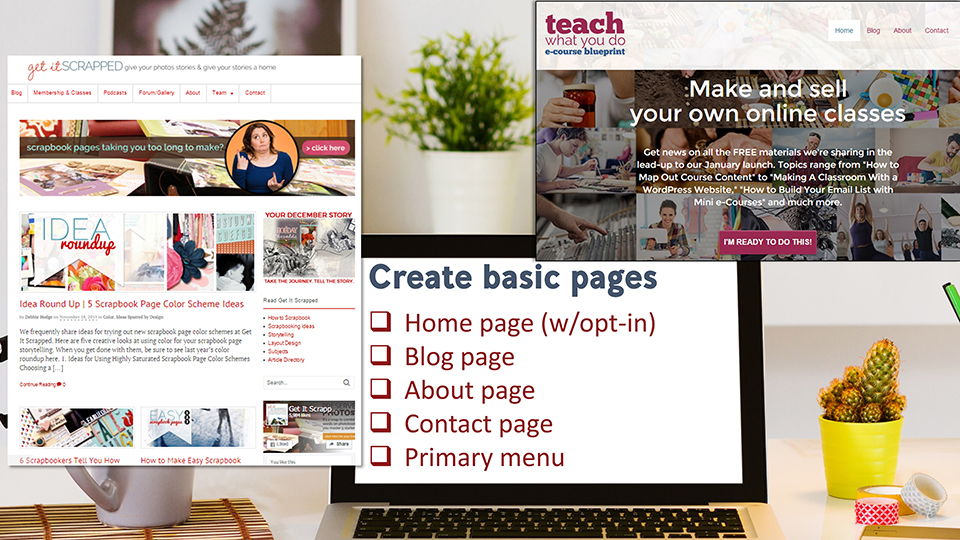
So let’s start with your home page. Your home page might be a static page that presents your business or it might be your latest blog posts or it might take some other form. At Teach What You Do, I’ve got a static page. At Get It Scrapped, I’ve got a blog template.
To make a static page your home page, ADD a new page to the site, enter the content and then set it as the front page from the backend of your WordPress site under >Settings >Reading.
If you’ll have a blog on the site, you’ll be entering each entry as a POST. And you’ll set up a Blog PAGE for displaying those posts, usually with most recent first. To set this up, add a new PAGE to the website and find the spot to choose the page “template” – there should be a “blog template” to choose from. Publish this empty page that has a template type of blog. When you look at it, you’ll see that it presents the blog posts, usually in a grid or series of excerpts.
If you want this to be your home page, set it from the backend from >Settings > Reading
One of your first web pieces will be your ABOUT PAGE. I mentioned earlier that the about page on your site will be one of its most heavily trafficked. AND that it should be as much about your customer and what you can do for them as it is about you. So create a page with your about information.
Add also a contact PAGE so that people can get in touch. Again, you’ll publish a PAGE for this. Many themes include a CONTACT template that automatically sets up a form for contact. You can also simply link to your email or present your phone number.
With these basic pages set up, add them to your primary navigation/menu. The WordPress menus are set up under the Appearance area of the dashboard. You can see I have menus along the top of my websites. TWYD has Home, Blog, About and Contact.
When you plan and set up your home page include an OPT-IN spot or button above the fold – in other words visible without the visitor having to do any scrolling. On my sites, the banner on Get It Scrapped is my opt-in. If clicked, a box for entering email pops up. On Teach What You Do, there’s a magenta button calling for a CLICK.
So now it’s time to DO THE WORK.
Click here to download a fillable pdf for tracking your own process. You’ve got a plan. Print it out. Add your own notes and adjustments, and get started making a solid web home for business and your e-Course.
