 Adding a “live virtual event” to your online course lets you personalize your teaching and address students’ questions regularly and in depth so you can ensure their success.
You might call your live virtual event a webinar, webcast, live stream, live meeting, teleconferencing, live masterclass–or something else. Whatever you call it, the beauty of live teaching is that, with it, you can offer your students:
- support, accountability and coaching
- hotseat sessions and critiques
- live lectures from yourself and/or guest experts
- community
In this post you’ll learn the tools and software needed and considerations for choosing a meeting or webinar service. (If you're wondering how you'd teach other than with a live event be sure to check out last week's post on the 3 kinds of lessons that belong in your online courses.)
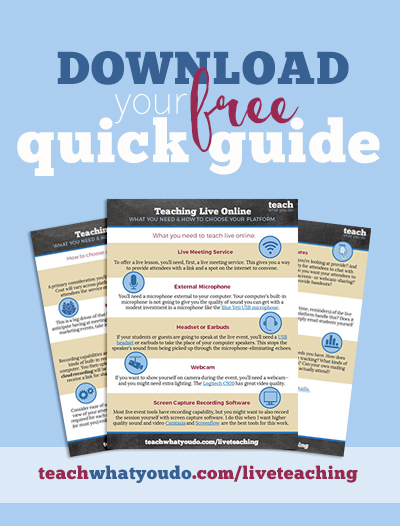
Here's what you need to host live teaching sessions for your students
Live meeting service
To offer a live lesson, you’ll need, first, a live meeting service. This gives you a way to provide attendees with a link and a spot on the internet to convene. A few of the currently popular tools for this are Zoom, GoToMeeting or GoToWebinar, Adobe Connect, and AnyMeeting. You can also teach live in a Facebook group using Facebook natively or connected it with a 3rd party tool like Zoom, eCamm or BeLive.tv for extra features. In the second section of this post are points to consider when choosing your platform.
Microphone
You’ll need a microphone external to your computer. Your computer’s built-in microphone is not going to give you the quality of sound you can get with a modest investment in a microphone like the Blue Yeti USB microphone.
Headset or Earbuds
If your students or guests are going to speak during the live event, you’ll need a USB headset or earbuds to take the place of your computer speakers. If you use your computer speakers, the sound could be picked up through your microphone and you'll get echoes. I like to use the Logitech Clear Chat. NOTE: It does have a microphone on it that I use for one-on-one skype chats, but during a webcast for my students, I choose my external microphone for the broadcast and just use the headset as speakers.
Webcam
If you want to show yourself on camera during the event you’ll need a webcam—and you might want to set up extra lighting. The Logitech C920 webcam has great video quality. For extra lighting with this webcam, I sometimes use one of the softbox lights from this Cowboy Studios Quick Softbox Lighting Set. If you've got a bigger budget and need even better lighting, you can use the Diva Ring Light. NOTE: The webcam will have a built-in microphone. Don't use it. Instead choose your external microphone.
Screen Capture Recording Software
Most live event tools have recording capability, but you might want to also record the session yourself with screen capture software. I do this when I want a higher quality sound and video recording. Camtasia and Screenflow are the best tools for this work.
Here are key considerations for choosing your live-meeting platform
As you choose a live teaching, or “webinar,” platform, keep in mind that not only will you use it for teaching (in what might be smallish groups), you may also want to use it for marketing with significantly larger groups.
Cost
A primary consideration you’ll use when choosing your meeting platform is cost. Cost will vary across platforms and is impacted by the number of meeting attendees the service enables and the kinds of features I detail below. So what can you afford month after month? What are the options the providers offer for scaling up or down? Can you do this scaling on-demand? How well do the features you're paying for match your needs?
Number of Attendees
This is a big driver of that first consideration: cost. So how many students you anticipate having at meetings? If you want your service to do double duty for larger marketing events, take that into account as well as the cost tradeoffs at the different levels.
Recording Capabilities
The recording capabilities and processes vary across providers. You are likely to run into two kinds of built-in recording capabilities:
platform-facilitated local recording. A local recording will save to your computer. You might then need to run it through a conversion tool to get an mp4 file that you can upload to your video hosting (i.e., Wistia or Vimeo), save privately, and then share with students. With this option, you have the opportunity to edit the file.
platform-facilitated cloud recording. A cloud recording will be saved by your service provider online. Quite often you then receive a link for sharing that video. Check out the details on how many videos you can save, how long they are available, and what the privacy settings are.
Both kinds of recordings can fail. If recordings are important to your work, always make sure you've got a second recording. You might do this by logging in on a second computer as an administrator of the account and saving another local or cloud version.
make your own screen capture recording. You can always make your own recording with screen capture software. Do this when: 1) you have any doubts about getting a platform-created recording, 2) you want to be able to edit the video, 3) you want to get a higher quality recording than you platform provides. As I mentioned above, Camtasia and Screenflow are the best tools for this work.
Ease of Use
Consider ease of use from the both your point of view as a host and the point of view of your attendees. Consider things like whether a download of software is required for each attendee. What kinds of devices can they attend from? Can you (or must you) embed the webinar on your own site? This is a cool feature—but it may also require other tools and a certain level of hardiness from your server. How easy is it for you to share slides or your screen in general? Get a trial of any platform you're considering and run through the kind of session you'd offer.
Interactive Features
What kind of interactive features does the service you’re looking at provide? And what features do you need? Do you need the ability for attendees to chat with each other via typing (and to see who is present)? Do you want your attendees to easily join in with their own microphones and even screen- or webcam-sharing? What about the ability to run polls and provide handouts?
eMail Capabilities
Do you need to communicate details (attending link, time, reminders) of the live event with your registrants via email? How does your platform handle this? Does it include a sign-up and auto email feature or will you simply email students yourself with one shared link?
Analytics and Tracking
Finally, consider the analytics and attendee tracking needs you have. How does each of the platforms you're considering handle attendee tracking? What kinds of analytics do they provide about in-meeting participaton? Can your own mailing list can be automatically updated with those who actually attend?

Are you ready to get to work?
Click on the gold bar above to get an easy-to-reference list of the tools you'll need and the considerations for getting your own web-meeting room set up.