
The starting place for making an exceptional online course is the transformation you will bring about for your students.
From the very beginning, when you develop your class and its outcome, be sure to go beyond saying of your class: “At the end of this class, students will know. . .”
Instead, design your class to be able to say: “At the end of this class, students will have made, achieved, become . . .”
Make sure your students come out of your online course newly capable:
They'll be able custom design the look of their home with sewing and design skills.
They'll be more effective teachers.
They'll be better partners in a marriage.
They'll have repaired their own bike.
They'll have documented their family's genealogy on video.
Your students come to you because they want to be capable of something new, and it's your job to give them everything possible enable that success.
There are many aspects of your course design that contribute to your students' successes-and to your own success as their teacher.
In this post, we're focusing on one aspect of making a class that delivers and competes: presenting your “on-demand” lessons in multiple formats. (If you're not familiar with three basic types of lesson content, including “on-demand,” be sure to read “What eCourse Lessons Look Like: 3 Kinds of Online Class Content.” )
Mutliple lesson formats aren't hard to create and they are key to your student success
Presenting a single lesson in multiple formats (video, written, audio) will address your students' learning preferences and provide lesson reinforcement opportunities.
So, let's dig into how this works. Have you already got an idea of how you imagine presenting your materials? eBook? On-camera video? Screen-capture video? Live webcast event?
Great. Now understand that once you've created the lesson in its initial format, there are both speedy and slightly more complex ways to replicate lessons in other formats
When you start with video: basic conversions
If you start with video, many students will appreciate simple transcript and audio versions to supplement that lesson (as well as time stamping on the video for speedier review). A transcript or audio version lets your students revisit the lesson in a way that might be more efficient for them or that let them reinforce their learning.
> Audio. Once you've made and rendered your video, now render an audio version. Check the output settings for your video editor to find the one that will let you make a simple audio.
> Written. Once your video is rendered, have a transcript made from a service like Rev.com. You'll upload the video and they'll return a transcript to you within 24 hours. Be sure to format your transcript to identify headers and even subheaders. Make it easy for your students to scan through and find they points they want to review. If you wrote a script for your video, you could use that.
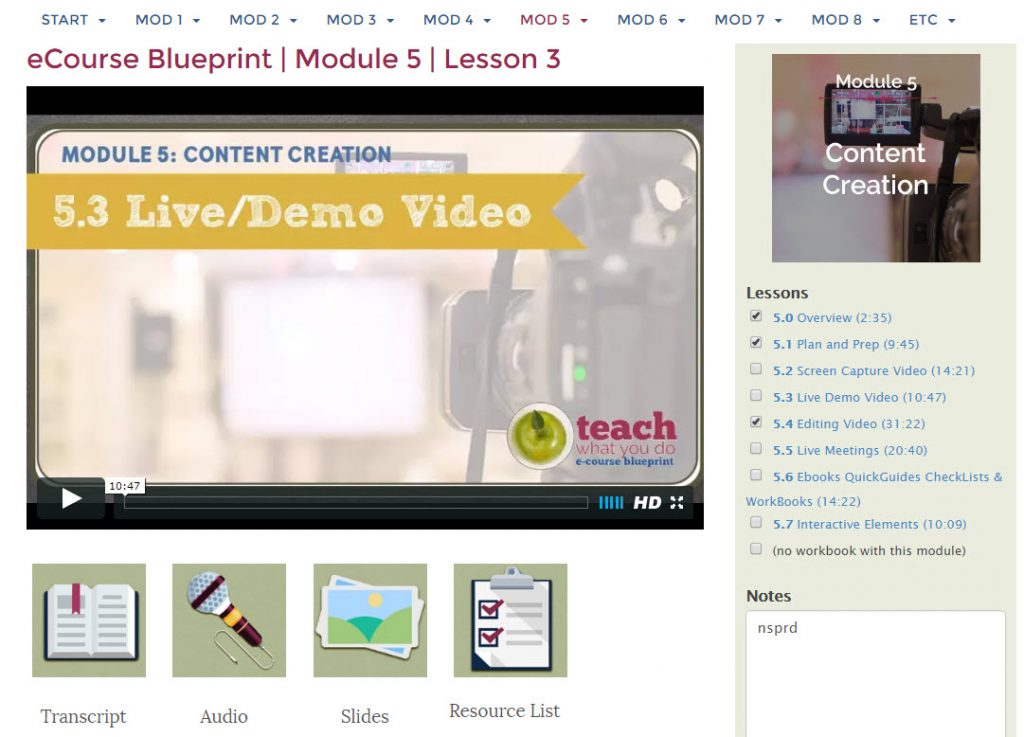
EXAMPLE: Basic conversion of video to pdf and audio. The eCourse Blueprint at Teach What You Do is a big class with 8 modules and 24 lessons. Each lesson is presented in video format initially, and then below the video are links to the same lesson in written (transcript) and audio formats. The Powerpoint slides are also included along with any worksheets. The video is the primary delivery mode, and the transcript and audio are supplemental.
When you start with video: take it farther
For a more elaborate eBook version of the video, you can use stills from the video to illustrate either a complete transcript or an abbreviated quick guide.
The most detailed version would combine stills with the complete video transcript to create an eBook. This would work well with a video that was created with slides, since you've got ready-made and relevant illustrations.
A quicker pdf version (which just might be more useful because of its scannability) provides a quick guide to the full video lesson. To make this pdf, export still images from the video lesson as JPG files. Choose these stills to illustrate the key points of the lesson. Place the images into a pdf with key steps listed. This eBook functions as a roadmap to the work. The video fleshes out more details and is an essential first stop for students.
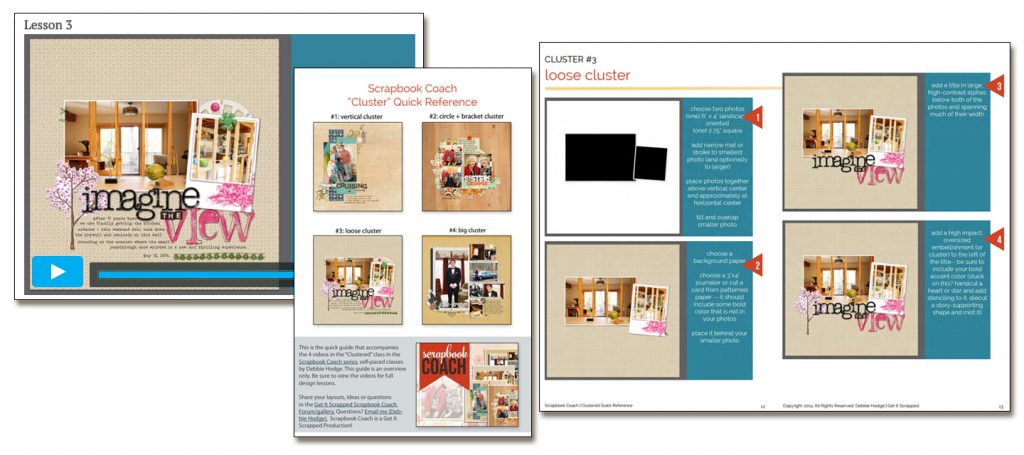
EXAMPLE: Advanced video-to-eBook conversion. I create a pdf “Quick Reference” for my Scrapbook Coach classes at Get It Scrapped. Each lesson is 15 minutes long and teaches design while demonstrating the making of a scrapbook page. Once a student has gone through the video lesson, the accompanying Quick Guide is a way to recall those steps and see important points highlighted. Stills are taken from the video, and key steps are highlighted.
When you start with written lessons: basic conversion
If you started with an eBook, an easy-to-make supplement is an audio version. Simply read the book and record this audio.
When you start with written lessons: take it farther
It can be easier than you might think to create a video from an ebook.
Option 1. Direct-to-Camera Video. Your first option is to record a “direct-to-camera” video. If you've got easy facility with the material, consider filming yourself in front of a white board, talking through the materials and recording this classroom-styled lecture. An easier direct-to-camera option is to get your ebook text into a teleprompter (you can buy one to work with your tablet for less than $150) and record you teaching to the camera.
Option 2. Screen-Capture Video. To begin you'll need images to illustrate sections of the book.
- These might come directly from your eBook
- You might use stock photos and images
- You might take photos yourself.
Once you've got these illustrations, put them into a slideshow (Powerpoint or Keynote). Then use a “screen-capture” video tool (Camtasia and Screenflow are my top recommendations for this) and a good microphone. Read the book (with feeling!) as you show the images in the slideshow. You'll capture these to video with your screen-capture tool and then render to an mp4 video you can share. I've used this approach to update older classes at my scrapbooking education site.
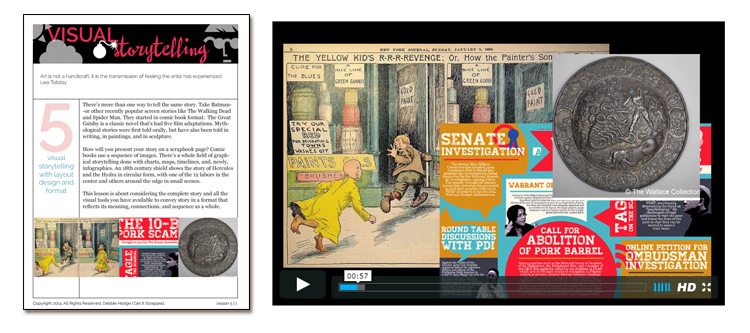
EXAMPLE: Advanced video-to-eBook conversion. I initially developed my “Visual Storytelling” class in eBook format–but it didn't take much to turn it into a screen capture video. Illustrations from the eBook were placed in Powerpoint slides, and I recorded a video of my voice reading the eBook lessons along with the slides.

So what is your preferred format? And how will you be adding supporting materials?
Now let's get back to your class. Always start with your students and their goal and the best primary format for teaching the content. From there, consider it a given that you'll add those easy-to-create supplemental materials so that your students have an easy way to revisit the material, whether to clarify fine points or simply to revisit and absorb your content. Then consider going the extra steps to turn a video into an eBook or to turn an eBook into a video.